
We all know that putting is the most important club in our bag but for some reason we are always on the driving range with our other 13 clubs. Putting is such a critical part of your short game and can save your golf score when your swing is off. Hopefully learning more about putting, putters and ways you can become a better putter will get you practicing on the putting green more than ever!
The putting stroke seems so easy to perform but why is it so hard to roll the 1.68” golf ball into a 4 ¼” hole? Besides getting the aim right on a sloped green, distance correct on a sloped green, and being mentally prepared to make the perfect stroke…so what’s so hard about this? EVERYTHING!
Let’s dive into some fundamentals and ways that will help you groove your putting stroke so you know exactly how you will putt the golf ball every single time. After that, it’s up to you to practice and groove it to have a consistent putting stroke. You will build more confidence with your stroke and just focus on making the putts, not missing them.
Gripping a Putter
Gripping a putter can be fun because there are so many ways you can grip the putter. It’s about being comfortable and understanding how your grip can help you make a consistent stroke. It doesn’t matter if you played on tour or in your local league, you have the ability to become a consistent putter. We want to at least give your stroke a chance to become a good putter and it all starts by how you grip the putter.
There are 2 common ways to grip a putter but there are many other ways for you to grip a putter and each way has a purpose to help you stroke the ball and give you confidence.
Common Putting Grips
- Conventional – This is the most common grip used by players and is typically considered the most comfortable.
- Cross-handed – This is the 2nd most popular grip and provides more consistency by using more of the shoulders than wrists.
Alternative Putting Grips
- Vertical Claw – New way stabilizing lead hand and using lower hand palm-facing to guide the putter head
- Sideways Claw – New way stabilizing lead hand and using the trail arm to guide the putter head
- Arm Lock – This requires a longer putter than your standard 34-35’ putters that locks against your lead arm
- Prayer Grip – Not used often but could help by leveling out your set up and having your palms face each other at the same level
- Broomstick Grip – This also requires a long putter and a long grip that has your hands split holding the top of the club and the middle of the club
Whichever grip you decide, just make sure the grip pressure is loose enough so you can feel the weight of your putterhead. That is one of the reasons why there are so many choices on how you can hold a putter.
Whichever grip gives you the comfort of releasing the putter at impact, use it even though it may be unorthodox or even a way you never imagined of calling it your putting grip. Open your mind and try these different ways and give it a chance.
If you are reading this putting blog, I am guessing you are looking to learn new ideas and tips so let’s try it and give it a chance and see what happens!
Read more about each of these grips in my Gripping a Putter article.
Putting Setup and Stance
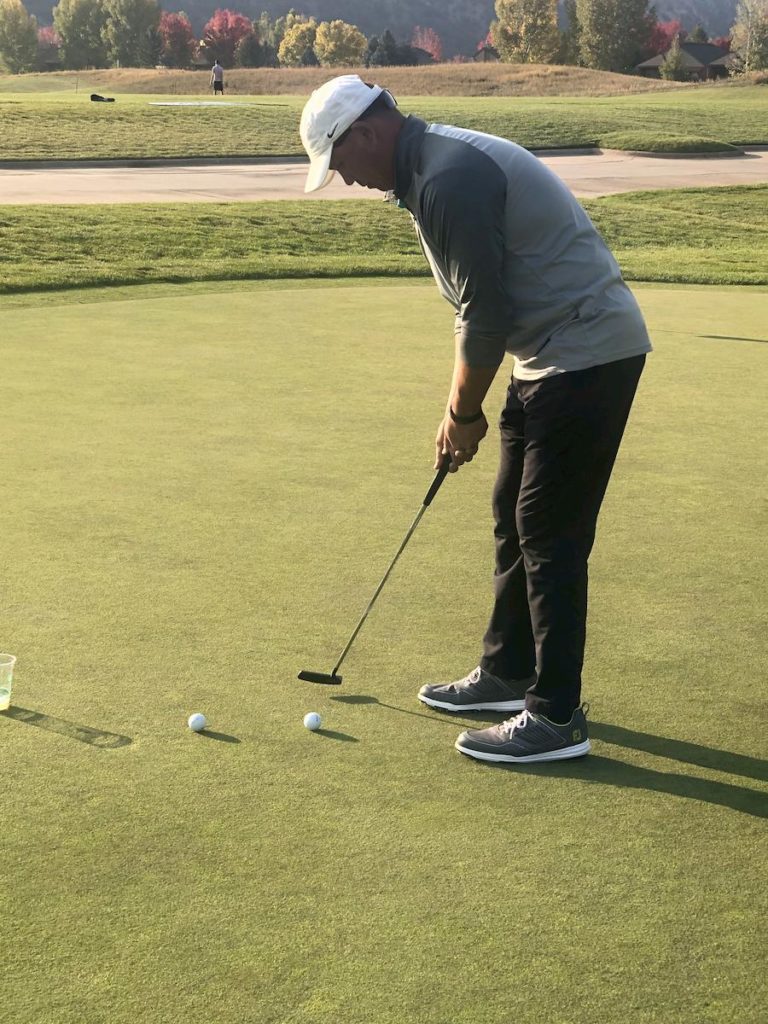
Setting up over the golf ball is very important as many factors can make you consistent or inconsistent. We want to make sure our putts are strokes and not swings. This means that we want to get our posture more over the golf ball to eliminate lower body movement and to create a consistent movement with our upper body using our spine and neck as this axis.
- Stand closer (8-12” to ball) with feet closer together (inside shoulder width)
- Hold putter out in front hip-high keeping arms and shaft in same line
- Get upper body over ball by bending from the hips
- Stick your tailbone out a bit and keep legs slightly bent
- Arms close to body with hands 2-3” away from it (promotes arc path stroke). Some good players keep their upper arms close to their torso to feel it as one unit
Ball Position
Placing the golf ball in the proper position can determine how consistent you can be with distance and keeping the ball roll more on your intended line longer. The position is similar to hitting a 6-iron. Just 1-2” right of your leading foot.
Our goal is for our putterface to make contact with the golf ball just on the upswing of the putter face but at the low point of the swing arc. If the ball is in the middle, it would make contact on the way down which is too early and inconsistent contact. An upward motion with sweet spot contact is what will create with the ball positioned correctly.
Putter Alignment
I see many players not use the line properly on their putters from their eyesight so I want to make sure we find the sweet spot on the putter face. Depending on the putter used and path type of the putter it may look differently over the golf ball. The angle of the putter shaft is also important to make sure we create the most consistent way how the ball leaves the putter face.
- If you have a toe-hang putter, the toe of the putter may be a bit higher off the ground to promote the arc-type stroke. The alignment line on your putter will be angled so the ball will be positioned ever so slightly towards the heel. Your golf ball should now be aligned on the putter face sweet spot.
- If you have a face-balanced putter, we want to promote a straight back and through path so your putter will be flatter to the ground evenly. The alignment line on your putter to the ball should be straight forward.
- The putter shaft should be leaning towards the hole ever so slightly so the grip and your hands will be just ahead of the golf ball. This will promote a better angle at contact when the putter releases just on the up-stroke.
Putting Stroke
Shoulders
Your shoulders are the biggest lever of your stroke that will ultimately control your consistency. Golfers have a tendency to use their arms and hands to get their putter down the target line. In order for you to use them at all times, try loosening up the tension in your putting grip. This stroke does not need power so let’s get less handsy but still keep a firm angle with your wrists.
Tiger Woods considers his putting Grip tension 5.5 out of a 10 being the tightest. With less control in the hands, we need to rely and trust that the shoulders will create a consistent stroke without forcing or guiding it. If you use your shoulders, we will create that pendulum motion to feel the putterhead. You want to visualize the putterhead always behind your hands so you can release it better at impact.
Spine and Head
Think of your spine as your axis. We want to create this pendulum motion where it uses the spine as a fixed point. If your spine moves at any time during your putting stroke, you will lose speed, accuracy and consistency.
This goes back to the old saying “keep your head down” during the stroke. This is true as your head, neck and spine are all connected and down the same line at setup. However, your head will slightly rotate and react to see where the golf ball goes just after contact. Your spine and neck will still stay mostly still through the entire stroke though.
Back Stroke
When taking the putter back every great golfer has their own feeling or trigger in using their shoulders. Phil Mickelson has a forward press to trigger his back stroke. We all don’t need to forward press it at takeaway but we need something to start our stroke to create a routine. This is done as we want to create the same angle and speed of the putter head back the same every single time. Here are some back stroke triggers that can get you a routine:
- Slight forward press on hands
- Loosening up hands
- Putter head slightly leading the shoulders
- Keep wrist angle the same in leading hand
- Use your leading shoulder part of your back stroke
- A bit more pressure on lower hand fingers
- Point putter face more towards ground on the way back
Leveraging your shoulders and pivoting from your spine will allow you to perform a consistent putting stroke time and again.
Putting Tempo
Creating a stroke with the same rhythm can be a way to help you with distance control. When you keep the putter on a tempo, it makes you a consistent putter because your speeds are always the same and you can make contact with the putter face at the same angle consistently. A way to create a good tempo is to put a slight pause at the end of your back stroke. This will…
- “Restart” your downstroke so you can start from a paused/stop position
- Keep you patient so the shoulders can start the downstroke, not your hands
- Keep the putter head trailing the hands until impact
Length of Putting Stroke
The length of your putting stroke will determine your distance control but also accuracy of your putt. We want the clubface to make contact with the golf ball with all of its momentum and weight. I tell my students that you want to have your back stroke longer than your follow through. This helps build momentum and keeps the putterhead down your intended path consistently. When you do this, you will make the putterhead heavier and be able to feel the weight of it when making contact with the golf ball.
Because you have more momentum, you will allow the putterhead to release through contact on its own. This is why you see the follow through stroke a bit shorter than the backstroke. You will see this type of stroke more on short and medium length putts. This will help your distance control and also get your ball rolling end over end longer without guiding the ball with the follow through.
You’ll see some good putters take the putterhead back just past the outside of trail foot but end the follow through in the middle of the leading foot for example. Everyone has different techniques as long as it’s consistent but I think most amateurs need to try this to create more momentum. This way you can trust your putting stroke even before you make contact.
Release
If you have read most of my blogs, I use the term “release” in all of my instructional articles. Releasing the club is what needs to be done everytime we swing or put a stroke on the golf ball. The shortest stroke made in golf is putting but we still need that tiny sense of releasing the putterhead at contact. It’s all about using the shoulders, lightening up the grip pressure and making sure your putterhead trails your hands up until contact without using your wrists.
Follow Through
After contact with your hands just in front of your putterhead, we want to let the putterhead release by feeling the weight of it through contact. If you do this correctly, the putterhead will catch up with the hands at contact which means your putter shaft will be vertical.
- Let shoulders and upper chest rock forward with putter
- Putterhead will get in front of hands while keeping the angle in your leading wrist
- End of putter will be pointing at the leading oblique at finish
- Head will rotate after the shoulders rock keeping spine/neck still vertical
- Putterface will point more upwards at finish for longer putts, face will point towards the hole more for shorter putts
Pre-putt Routine
Have you ever noticed that your practice putting stroke is nice and smooth but when you actually make the stroke to make contact, it’s a rushed or a decelerated stroke where you launch the ball too far or leave the ball way short – a completely different stroke that you just practiced with.
A routine can build confidence and create a consistent stroke you can consider your own putting stroke. Here are some suggestions and ideas you can use to build up confidence and prepare a routine for your putts
- Arrive to the green with a purpose – Start reading the greens as soon as you walk on and you can more likely read your putt from different angles including uphill/downhill.
- Make your decision – Envision your line and see the golf ball go in the hole on the high side unless it’s a straight putt. If you use an alignment marker on your golf ball, set it down and believe in it. Even if you are unsure about how much your putt will break, you need to pick a line or an intermediate target no matter what. You might get lucky but you need to commit so you can focus on your stroke.
- Practice stroke – Let’s use this wisely! We don’t need this to warm up our shoulders so let’s find the tempo and length of our stroke a few times until we feel confident that we will replicate it and then use it when we actually make contact with the golf ball. Note: take a look at the hole a few times as you’re making the practice strokes.
- Approach your setup the same way every time to help your alignment become consistent.
- Be confident and GO! If you picked a line and replicated a stroke to get the distance correct, just go make the putt. Do not stand over the golf ball too long as you will lose the feel of your practice stroke and lose focus. You won’t make every putt but we need a routine that can give you better odds if you keep the process the same leading up to the actual putt.
Reading a Green
Learning how to read a green is so important because it must be combined with a great putting stroke to make your putts. Reading a green means understanding the slopes and speeds of the greens which can vary based on weather, grass type and how they are maintained by the golf course.
Here are some tips on reading a green. You can read more details in my How to Read a Green article.
- When you are approaching the green, use your time well by walking onto the green at a certain angle so you can see multiple views of your putting line.
- Most commonly used and the best angle is looking behind the ball on the line to the hole. Kneeling down can get you a better view of the contour of the green.
- I recommend looking at your line from the low side if you determine that low side. You may be able to see more of the slope facing you to determine how much lower you are than the other side of your putting line.
- Find your Intermediate target on the putting surface. You want to find a color blemish of grass or maybe an old ball mark to use as a fixed point or the apex of your putting line. Usually pick that target halfway or less to the hole so you can pinpoint your aim. It doesn’t have to be exactly on your line that you read but can use it to visualize your ball on how it will break if it goes right over that mark, or left or right of it.
- Walking around your putt can help you determine if there is any slope that would make it uphill or downhill.
- You can use your feet to determine if one side is higher than the other. Go to a point on your line and hover the putter over your line as you take your stance. You may feel your feet lower or higher on that side so feel it. Many players are starting to straddle the putting line and see if one foot is higher than the other one.
Now that you’re all set with putting fundamentals, get on the practice green and hone your skill until you’re more comfortable with all types of putts from any spot on the green. You’ll want to spend hours on the putting green to become a better putter. Adding some structure to your practice routine by following putting drills can also help.